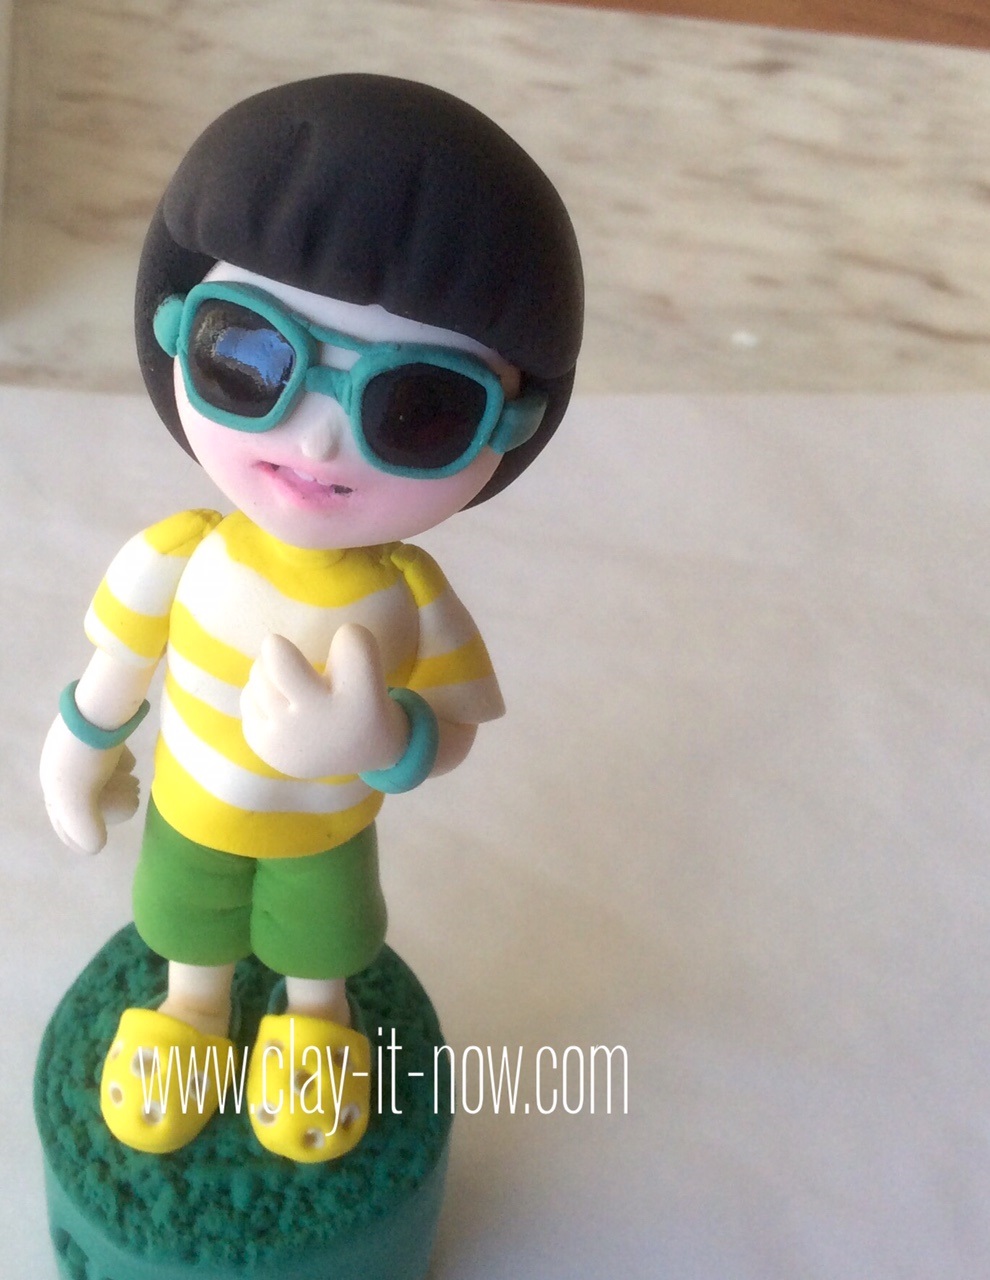
Cool Boy Figurine:
Sharing the Steps to Make Lifelike Figurine
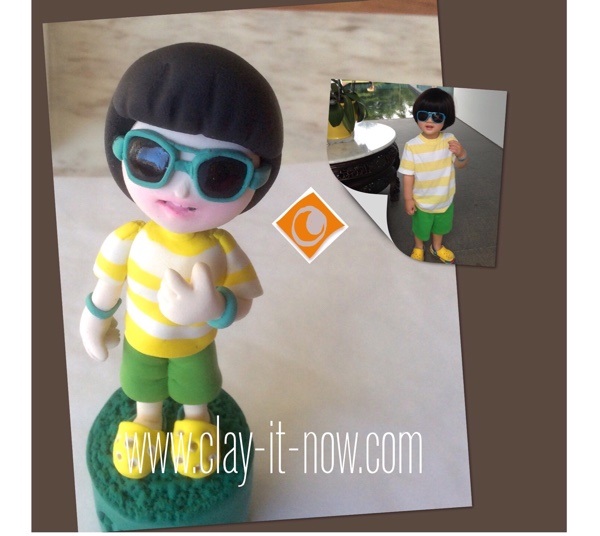
Cool boy figurine is a work we are sharing about how to make a lifelike figurine from scratch. We didn't use mold. It's 100% hand-crafted with basic clay tools.
Sometimes when someone gave you a photo and asked you to make a mini-me figurine, you might have no idea how to start. I'm sure you will think about the details and then panic thinking how much works you have to do.
Relax! and remember the KISS (Keep it Simple Stu...ops...you know that word :))
Basically, there are two ways to make mini-me figurines.
First option is to capture the person dressing style, position and other elements resembling the picture in simple shapes with a doll face like the one we did for One Summer Day by a girl from MinienMonde blog or a cute mini figurine of a girl with traditional German dress, Dirndl.
Second option is to simplify the shape of the person but keep it as close as possible to the real image. You can see our previous work on one of our football player figurines, Pirlo and on this boy figurine.
Alright! let's start our clay project with the second option.
Steps to sculpt lifelike cool boy figurine head in simple way:
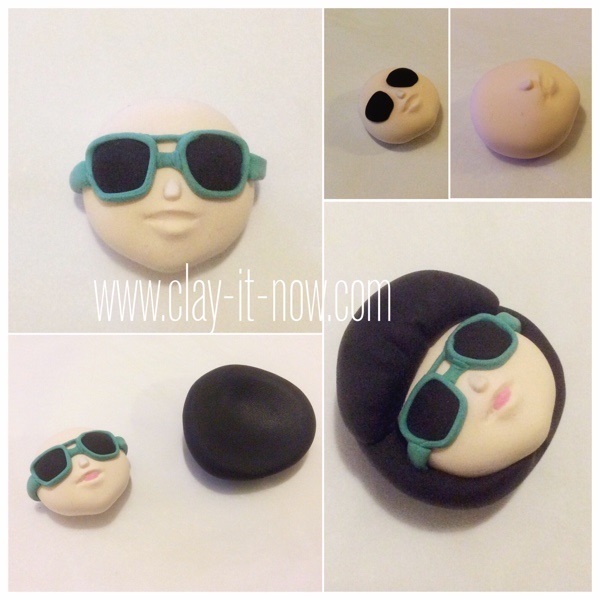
First step, of course we need the face, don't we? This is the tricky part.
I would say your work is 40% done if you get it right. If not, just go for the cute doll face rather than making something that people can not relate to :)
But, no worries. I'll share the tip with you to get it right.
Print the photo or trace the face with tracing or baking paper from your computer to the size you need.
Next, roll your clay in skin color to a ball shape than put it on top of your tracing image and reshape the clay to the face outline. It's easy, isn't it? Got it?
After you've done the face, sculpt the facial elements.
For the cool boy figurine, the sunglasses and his smile with cute two front teeth are the main elements.
Then, we move to other parts of the body.
|
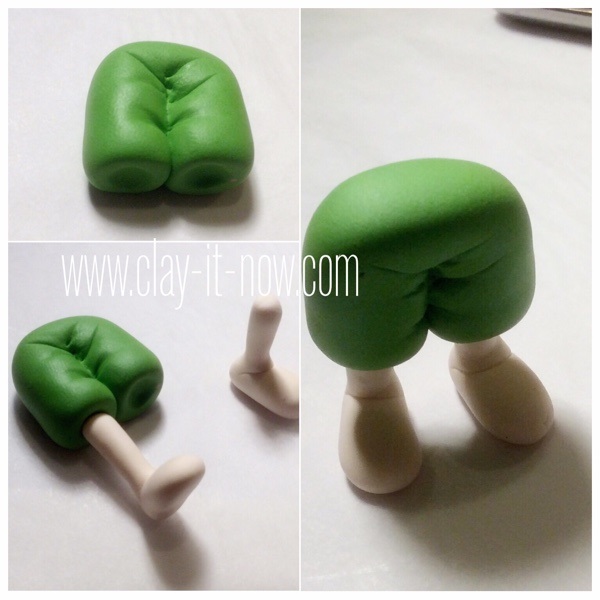
You might just follow the picture to shape the boy's pants and legs. | ||
|
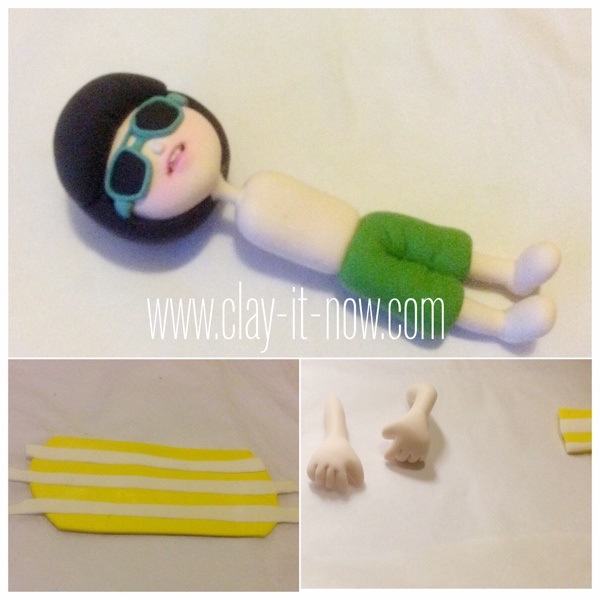
Next, roll the clay to almost rectangular shape for the body. Attach it to the pants and then slowly insert the toothpick . Leave it until it's almost dry if you use air dry clay and then insert the head to the top end of the toothpick. |
Roll the clay in yellow color and add white stripes on it. Press lightly with rolling pin and wrap it around the body. And use the balance for the sleeves.
Finally, sculpt the hands and fingers and paste it to the body.
Make the base as you like and that's it!
Here is our lifelike cool boy figurine. Have fun!
Hope this tutorial is sufficient for you to make your own lifelike figurine. For more, you can check out our page on how to make clay characters for kids.
But if you are serious about making this type of figurines, you may want to learn from Katherine Dewey who wrote a book, Creating Lifelike Figures in Polymer Clay.
Please LIKE, SHARE and SUBSCRIBE to support my channel.
Share your craft
Do you make your craft? Share it!
