DIY Veiners for Clay
2 Ways to Make DIY Veiners for Clay:
I would like to share 2 DIY veiners for clay. These are hot glue veiner and clay veiner.
I've found that it's cheaper to make our own veiners than buying ready-made one. Also, we'll have flexibility to choose the size and patterns.
Honestly, I wasn't the first to find this technique but it works well for my clay flowers.
The hot glue technique was mainly used for mold. I think it's suitable only for small leaf or petal veiner.
Clay Veiners:
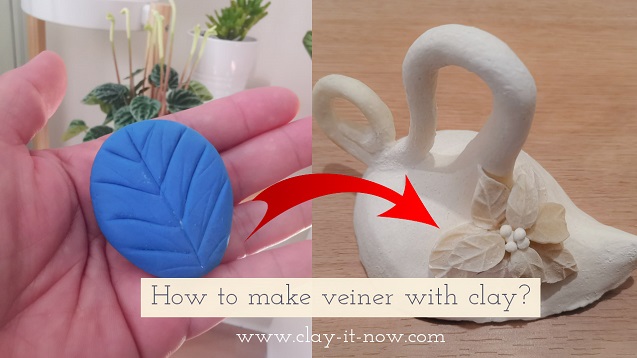
I've recently made veiners from air dry clay - a store bought soft clay type. It's very simple! So I thought hm.....I must share this with you.
The best thing about this veiner is you don't need to buy special material. It's not a silicon or putty. It's made of something that you've already has it: clay!
Below is my steps to make DIY veiners for clay:
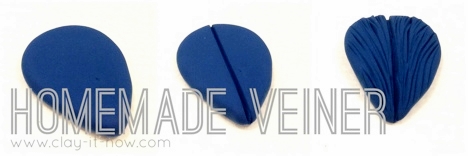
I started with rolling the clay to a ball shape and change it to teardrop shape and then flatten it with rolling pin.
Next, I used clay knife to draw deep line at the center of the petal. And, more lines at both side of the center line depending on the type of leaf or flower petal you want to make.
Basically, that's it.
Another method, use real leaf or flower petal as mold.
Use that real leaf / flower petal as a stamp. Press it down to your clay surface (tips: brush thin layer of oil or Vaseline cream on clay surface so it will be easy to remove the leaf later on) and wait until your clay dry.
Remove the leaf/ flower petal once the clay dry and you can use the pattern imprints on clay as veiner.
Recently I make poinsettia flower petals using my "very old" diy veiner. It works! If you want to see my clay craft video tutorial, please visit Christmas Mushroom Fairy House Jar DIY.
Hot Glue Veiner:
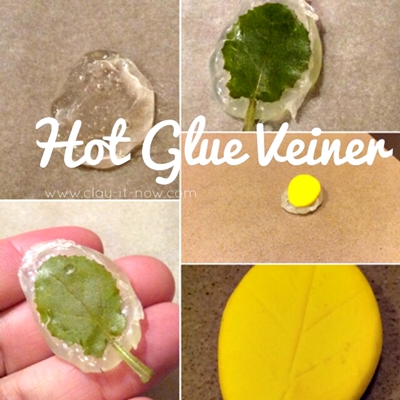
I can't find small leaf from plants or trees around my house but I saw weed at our backyard with leaf size just right for my miniature flowers. It's about 1.5 centimeter length. So I used this for my homemade veiner.
First of all, apply a thin layer of Vaseline cream (you can use your body lotion or baby oil if you don't have the cream) on to the leaf surface. If not, the leaf will stick to the glue.
Lay baking paper or aluminium foil on your kitchen bench or work table, draw the leaf and apply another layer of cream on the paper or foil.
Heat up your glue gun and pour the glue on to the baking paper. Press the leaf evenly on the glue and leave it for few seconds.
Remove the leave from the glue and you have leaf veiner now.
My first leaf veneer with hot glue gun wasn't really good because of the air bubble. But that's okay after few exercises. So, don't be alarm if you have the same experience with me. Try again. Practice makes perfect, right?
Honestly, if you ask me, I would prefer clay veiner than hot glue veiner :)
What do you think? I like to hear your experience. Please share your story with us at this page.
Thanks.
| Home | ^Back To Top Of DIY Veiners For Clay | Clay Flowers |
Please LIKE, SHARE and SUBSCRIBE to support my channel.
Share your craft
Do you make your craft? Share it!


