Beautiful Fairy Train Made of Cardboard/ Waste & Clay Paste
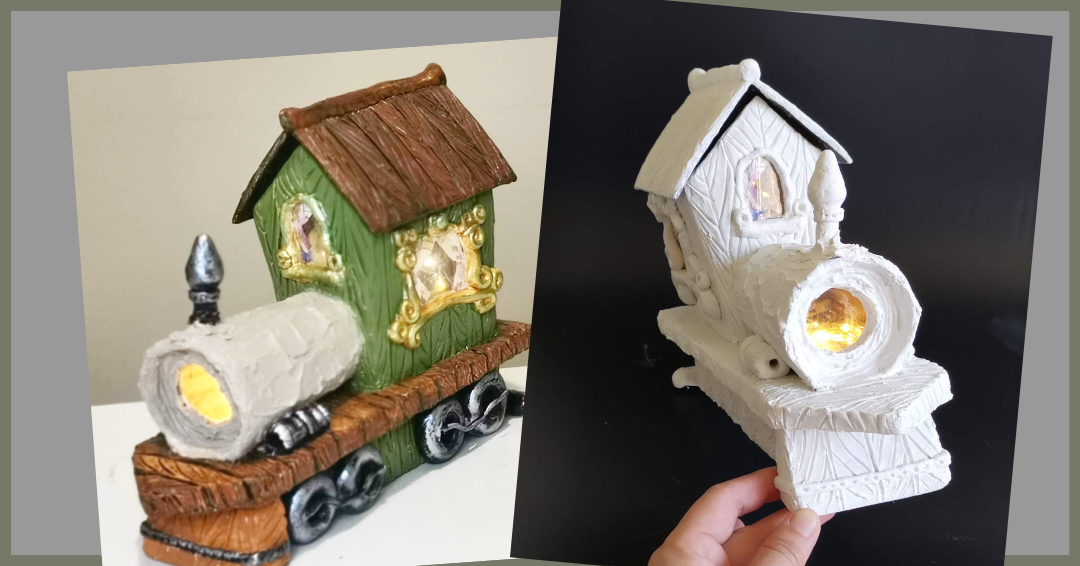
This fairy train could be needed soon by those fairies to transport them to a far far away place. Well, in case they are tired of flying. I think so. Oops..that's just my imagination.
I was watching the news and seeing overseas people start coming in to Melbourne, Australia few days ago since our border opened. And..yeah.. I was thinking about travelling too.
I was wondering if I want to travel by flight or train. Ehm.. maybe by train to nearby places (not overseas). May be my fairies would love to go around by train too :)
That thinking inspires me to create this fairy train.
Let's make the craft together with cardboard and waste at home plus clay paste or air dry clay.
Steps to make fairy train:
First of all, I built the basic train body using toothpaste box (no specific brand/ not sponsored - I am just using whatever toothpaste box I have at home).
Fill the empty box with crumpled newspaper until the box feels solid and strong.
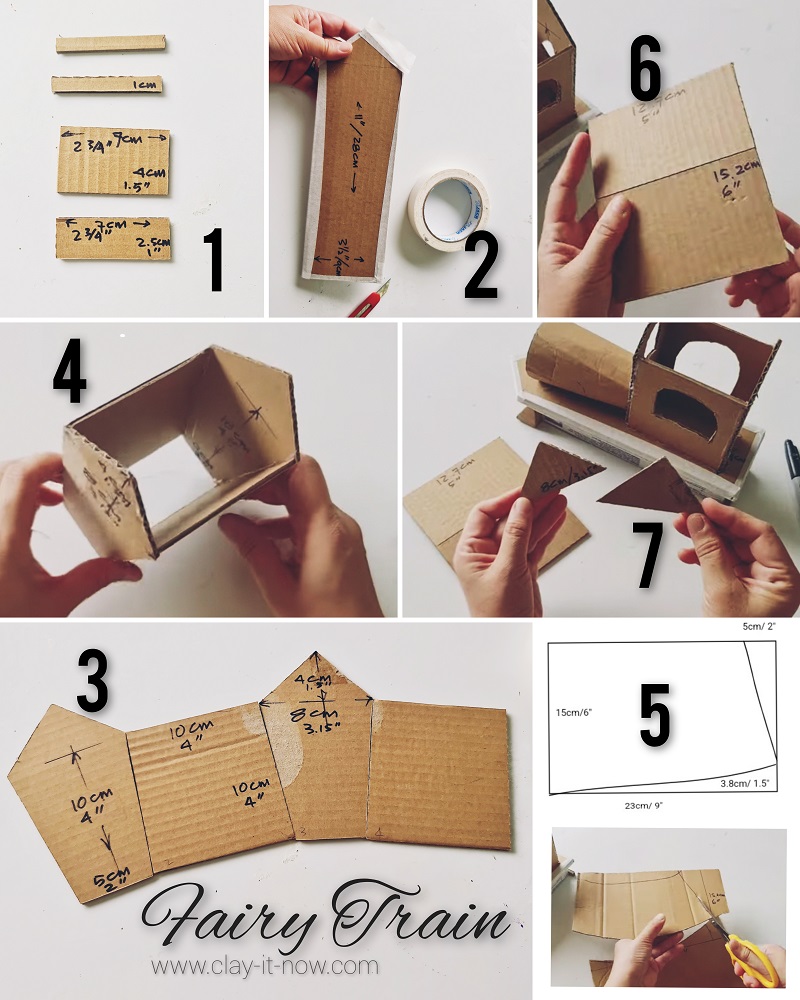
Next, I cut the cardboard like picture number 1:
- 2 pieces: 1cm x 7cm (0.4'' x 2.75") - stick together and paste it at the back of toothpaste box.
- 1 piece: 2.5cm x 7cm (1" x 2.75" - paste it to the base of front part toothpaste box
- 1 piece: 4cm x 7cm (1.6" x 2.75") - paste it from top of front part toothpaste box to the base for 2.5cmx7cm cardboard, forming triangle shape if you look at it from the side.
THE PLATFORM:
Then, I make the platform by cut ting 3 pieces cardboard number 2. I start with rectangular size 28cm x 9cm (11" x 3.5"). Find the center part and make triangle shape at one end (height of triangle: 4cm/ 1.6").
Paste those 3 cardboard together with hot glue gun, then use masking tapes/ painter tapes to cover the edges of the cardboard.
Place this platform on top of the toothpaste box.
THE HOUSE WALLS
After that, I make 4 walls of the house with cardboard as you can see on picture number 3. I assemble those 4 walls to picture number 4.
Cut the cardboard to below sizes:
- 2 pieces of 10cm x 10cm (4" x 4")
- 2 pieces of cardboard which has trapezium shape at the bottom and triangle on top continuously. Trapezium: 8cm x 5cm x 10cm (3.15" x 2" x 4"), Triangle: 8cm x 4cm (3.15" x 1.6")
THE HOUSE ROOF:
You can refer to picture number 5 and 6. Cut the cardboard to below sizes:
- 1 rectangular shape: 12.7cm x 15.2cm (5" x 6") - score the line in the middle and bend the cardboard to 2 parts.
- 2 triangle shape: 8cm x 4cm (3.15" x 1.6")
THE ENGINE PART: I think so :)
I was thinking about tree log rather than the engine :)
Anyway, you can see the dimension of cardboard at picture number 5. I cut the cardboard to rectangular shape 28cm x 15cm (9" x 6") and then tapered it at the side 3.8cm/ 1.5" and at the top right corner 5cm/ 2".
This is where the light with shine out when we put in the lights inside the house/ box.
I would recommend you to watch my video to see that I have added clear plastic and cardboard ring in front of this part.
Cut the windows on the house part including the part where we'll join the engine part.
Then, cover the cardboard with glue and napkins. Leave and wait until the glue dry.
When the glue dry, paint the inside of house/ box and underneath of the roof with black acrylic paints.
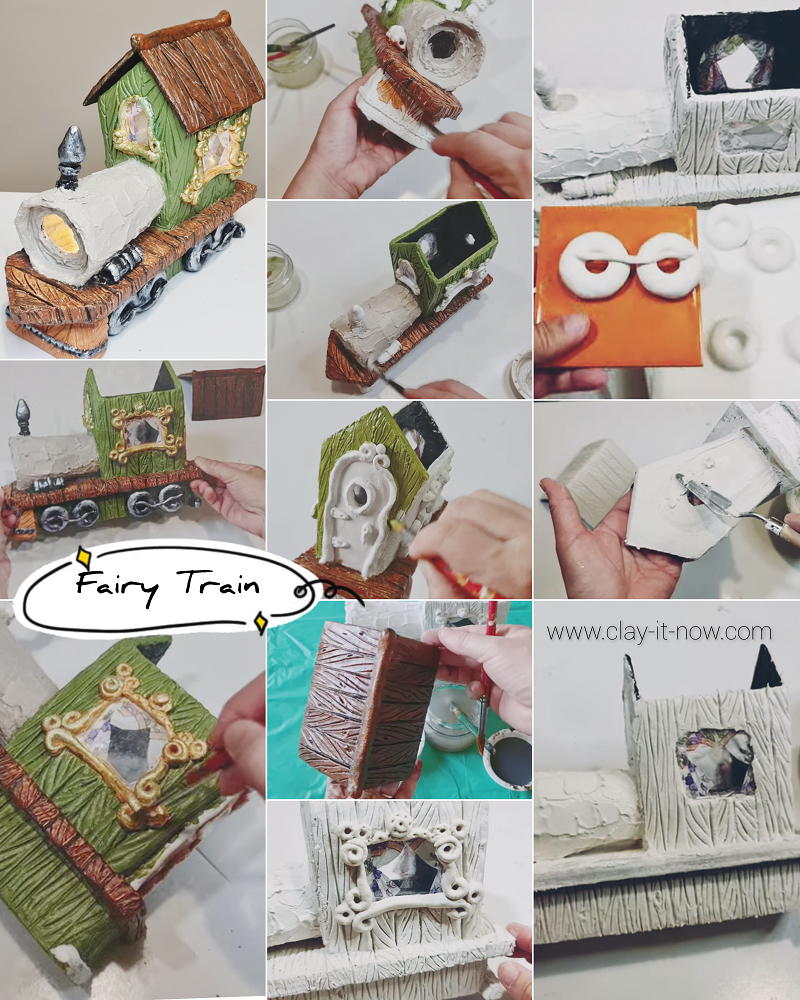
Next step is to cover the cardboard with clay paste/ texture paste or air dry clay - it's your choice.
In this fairy train project I use plaster clay. It is my usual thick clay texture paste but instead of plaster of paris, I use normal plaster/ gypsum from my local building material shop.
I did that out of my curiosity because I receive many question if we can use normal plaster instead of plaster of paris. Good news! the answer is YES.
If you don't have plaster and prefer to use store bought air dry clay like DAS clay, Crayola clay or FIMO clay, you can do so.
Please check out my article (what clay to buy) about 3 types of air dry clay available in the market before buying them.
If you use air dry clay, roll the clay with rolling pin, cover the cardboard, and then use needle tool to make the texture.
The highlight of this fairy train would be the windows. I use thin napkin for curtain and then decorate the window frames with air dry clay.
And, I use air dry clay too for the train wheels.
For detail construction steps to make the fairy train, you can see my video tutorial at my YouTube channel.
Please subscribe to Clayitnow channel if you like my works/ ideas so you'll get notification when I upload new craft video. Thanks.
| Home | Back to Top | More Fairy House Ideas |
Please LIKE, SHARE and SUBSCRIBE to support my channel.
Share your craft
Do you make your craft? Share it!


