Japanese Girl Figurine
Materials & Tools to make Japanese girl figurine:
- Air dry clay: any brand in your local stores or home made one. For this project I used Cold Porcelain Clay.
- Silver beads and pin for hair accessories.
- Red & black marker.
- Silver glitter glue.
- Elmer's glue.
- Rolling pin.
- Toothpick.
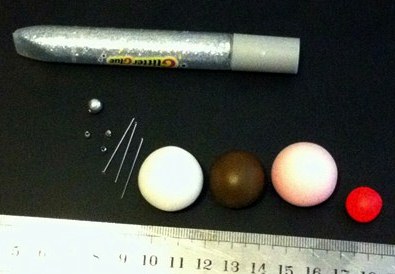
Prepare your clay with sizes like the above picture. I used basic color white and red clay. Mix a little bit of red with white to get the pale pink skin color, and then add more red for pink kimono. I used brown color for the hair. If you don't have brown color, mix red, yellow and black color clay.
Steps to make Japanese girl figurine:
Head, Face and Hair:
- Start by preparing 4 ball shape clay: 1 big one for head, 2 smaller ones for ears and 1 very small ball shape for the nose.
- Use your baby finger to press the middle of big ball shape for eyes lightly and let your finger go around the side of the ball.
- Press the 2 smaller balls for ears and press one side of it on the table.
- Attach the ears and nose to the head with white glue and insert the toothpick at he bottom and let it dry.
- When the clay dry, use your black marker to draw the eyes with eyelashes at the corner and the eyebrows.
- Prepare 1 ball shape, 3 small cylinder shapes and few short spaghetti strand for fringe in brown color.
- Flatten the ball and cylinder shape to about 3 millimeters and make some line on it.
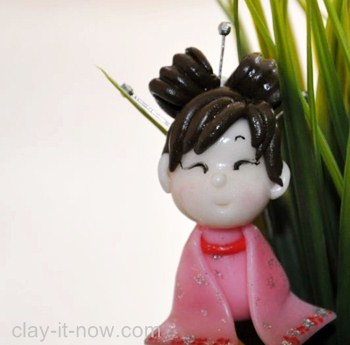
- Use glue to attach the hair to the head as shown in the picture and then insert the hair accessories.
Body/ Kimono with Obi:
- Roll your pink clay to an egg shape, sharpen one of the point and press the other end and flatten it to form the legs.
- Fold the legs to make a simple shape of a kneeling Japanese girl in kimono
- Roll your red clay to small pipe and cube and attach it to the upper body to form the Obi.
Arms/ Sleeves:
- Use your rolling pin to flatten the pink clay to about 3 millimeters, cut two triangle shapes for the sleeves and let them dry.
- Take your red marker and silver glitter glue to draw 4 petals flowers or just make some dots at the edges of the sleeves.
- Attach the sleeves to the body/ kimono with white glue.
When the body completely dry, insert the toothpick that hold the head to the body. And, your Japanese girl figurine is done!
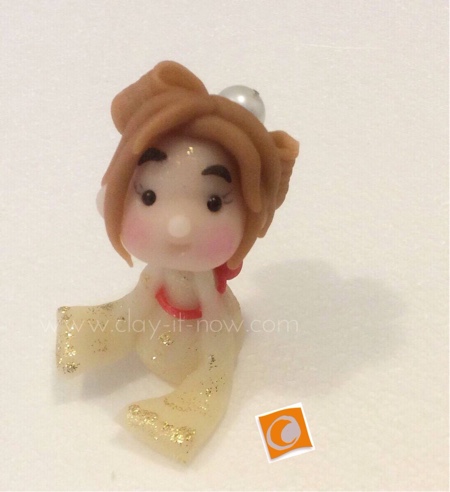
Update: I've made a new batch of cold porcelain clay recently and made the figurine again without additional color for her kimono (it's translucent). She has big eyes this time :)
Please LIKE, SHARE and SUBSCRIBE to support my channel.
Share your craft
Do you make your craft? Share it!


