Multifunction Mushroom House: Beautiful and Useful Craft from Waste

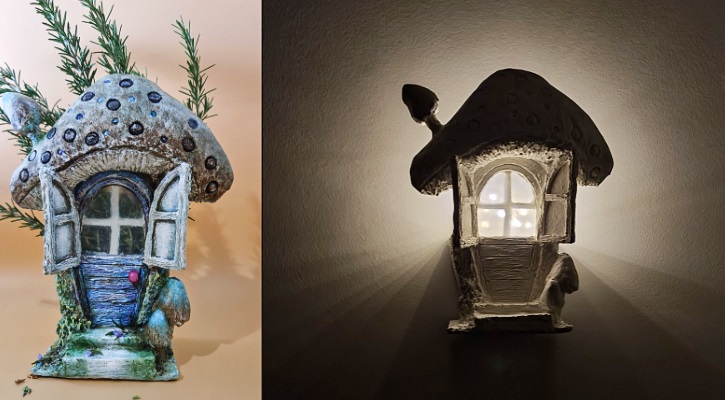
This mushroom house is my new favorite now. It has unique color with rustic wood door/ windows, beautiful and functional.
Steps to make mushroom house:
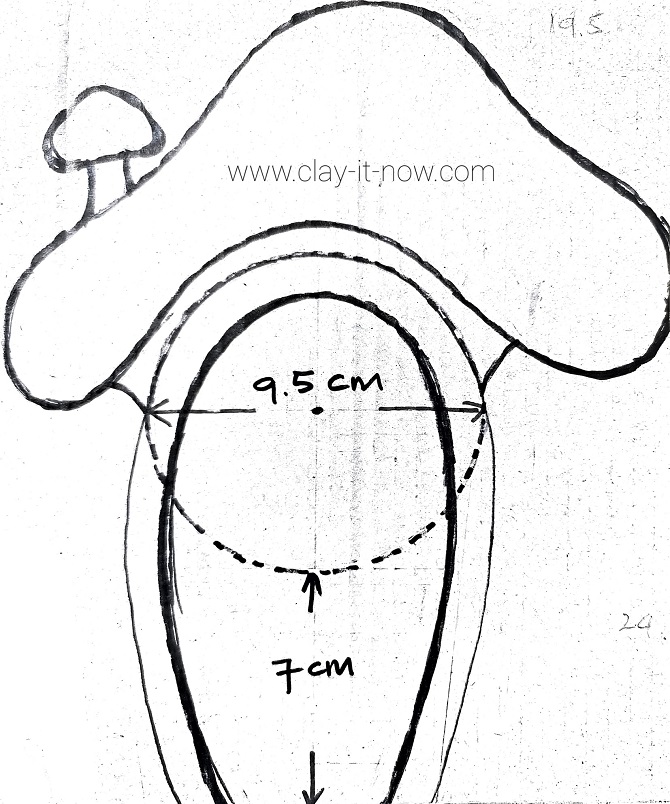
First of all, draw the shape of the house on the cardboard. I am sharing my hand sketch below. You can redraw the shape or print this and enlarge it to your desire size.
Start with a circle, diameter 9.5cm (3.7") and measure about 7cm (2.7") to get to the base. Determine how wide you want for the base of the mushroom. Mine is about 6.5cm (2.5").
Then, draw the curve line from left and right of the circle to the side of the base. After that, draw the mushroom head - free shape (as you like).
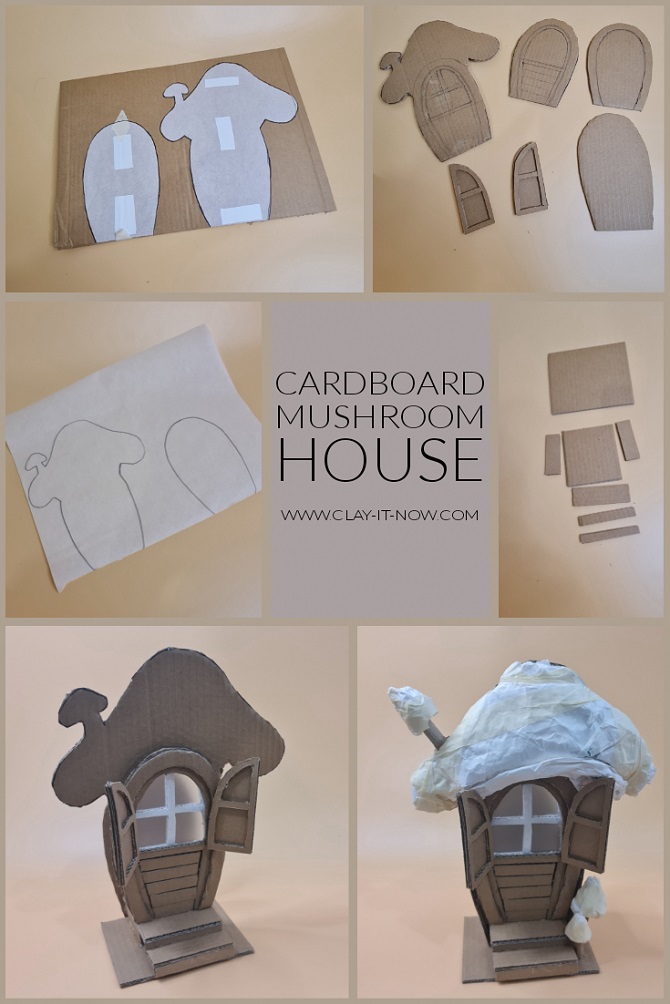
Use baking paper to copy the outline of all shape and the center part/ door with opening. Cut the baking paper to make patterns.
Paste the patterns on the cardboard and cut the cardboard. You will have 1 complete mushroom house outline, 3 door shape and 2 set of window shutters.
We'll have 3 layers of door so we cut 3 pieces cardboard for the door
Next step, cut the cardboard for the base with steps on the entrance.
I cut the cardboard to these sizes for the base and stick them with hot glue.
- 12cm (4.7") x 10cm (3.9") - 1 piece
- 7cm (2.7") x 8cm (3.1") - 1 piece
- 2cm (0.8") x 8cm (3.1") - 2 pieces
- 1cm (0.4") x 7cm (2.7") - 2pieces
- 7cm (2.7") x 2cm (0.8") - 1piece
When finish assembling the mushroom house, I attach the house to the base.
Then, I fill up the mushroom head with used packaging paper. I keep adding the paper until I am happy with the volume and then wrap the paper with masking tapes. At the end, I cut the small mushroom shape and add 3D mushroom paper to make it stands out.
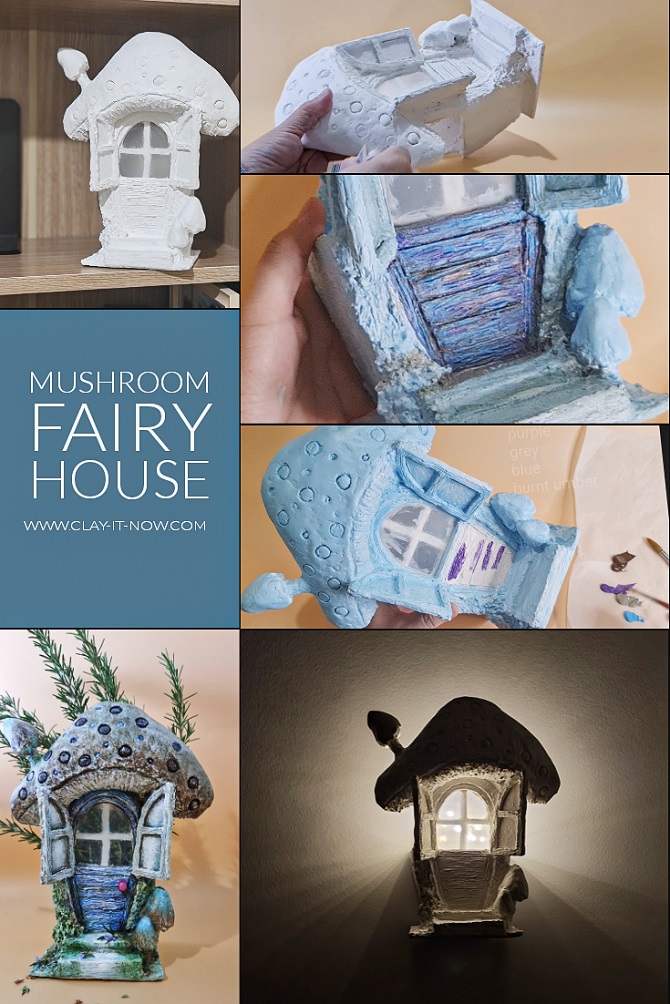
After all the shape established, I apply clay paste on all the surface. I make the paste from the mixture of plaster of Paris, flour and water with peanut butter consistency. You can check out my basic clay texture paste recipe as a guide but you need to add more flour/ plaster to make it thicker.
Alternatively, you can use usual store bought/ homemade air dry clay to cover the cardboard surface in traditional way by rolling the clay to a thin sheet.
But, I would prefer to use spatula/ palette knife to spread the clay which is faster and easier. If you want to do that, you can add water to your clay to make it soft and spreadable.
The next step, I use sand paper to smooth the clay surface after the clay paste dry.
After that, we are ready to paint the house and turn it to a beautiful mushroom house. I start by covering all surface with light blue acrylic paints (mixing blue with white and a little bit of water).
Then, I use burnt umber wash to make the mushroom looks more interesting.
I chose purple, blue, grey and burnt umber to make rustic wood look.
Finally, I use white acrylic paints with dry brush technique.
Btw, you can watch my video tutorial to make this mushroom house at my YouTube channel. And, remember to subscribe and turn on the notification so you'll know when new craft project uploaded. Thanks.
| Home | ^Top of Page | More Fairy House Ideas |
Please LIKE, SHARE and SUBSCRIBE to support my channel.
Share your craft
Do you make your craft? Share it!


