Little Pumpkin Cottage House
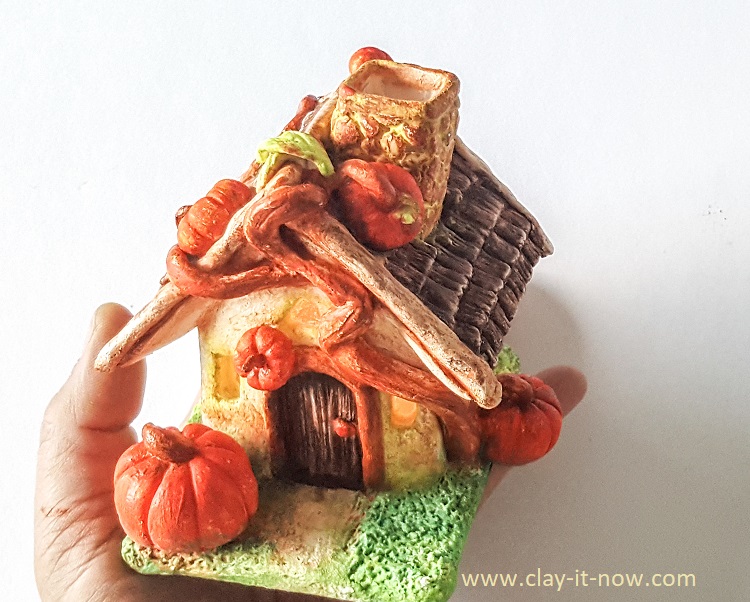
I've shown my little pumpkin cottage house to my friends for opinion. And, did you know what they said?
Here it is: " where did you buy that cute little house?"
Woohoo....they thought I bought it from store, not handmade by me ha..ha..ha..should I take it as compliment or an insult? Alright! they've just amazed at the end result of my creation.
Well, I am so happy that I could create something nice with very low budget.
Yeah..It was made from cheap materials: plastic bottle, plastic packaging, homemade clay / salt dough and a little bit of imagination :)
This is sweet and cute Halloween theme decoration (honestly, I don't like scary decorations for Halloween).
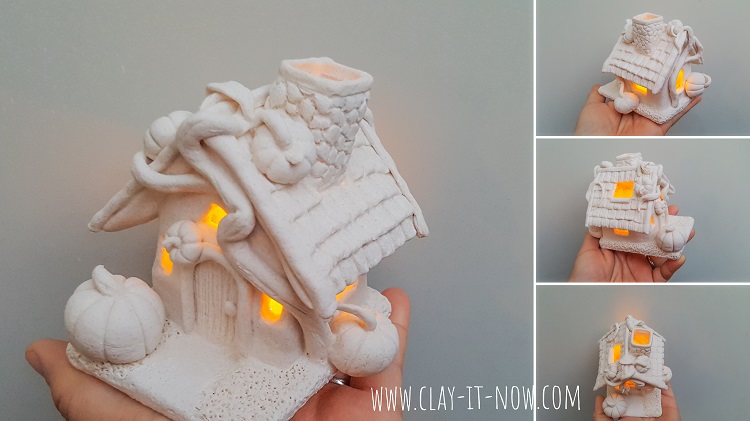
And, the good thing about this pumpkin cottage house, you can use it as table light at home or for the kids to play at night in the garden since the house comes with LED tea light candle with on and off button. Cool?
Steps to make pumpkin cottage house:
Step 1:
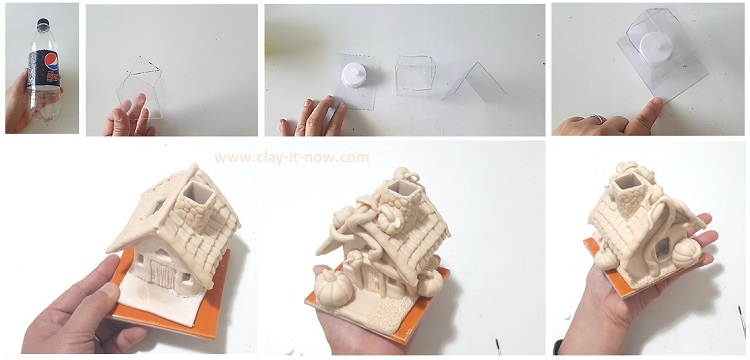
First of all, cut the body of your plastic bottle (any type) to about 10 cm or about 4 inches. You will have round shape plastic at this stage. Flatten the plastic and then make the creases by folding it to 1/2 then 1/4.
Then, draw the roof line and cut it following the lines you make. The end result will look like the second picture in top row above.
Oh..I may not describe the step well here. Please visit clayitnow YouTube channel to get more info. Ehm.. you can do it later though after reading all the steps here :)
Step 2:
Cut flat plastic packaging to a rectangular shape with the width slightly larger than the house width.
Make the round hole as big as the tea light and then use hot glue to secure the tea light.
Next, cut another rectangular shape from flat plastic and fold it to 2. Make sure it is long enough to cover the triangle shape that you make at step 1.
At this point put the roof aside. We'll attach it to the house in later stage.
Step 3:
Attached the house shape we've made at step 1 to plastic base at step 2 with hot glue.
Step 4:
Cover plastic base with air dry clay. Check out my page about what clay to buy if you are new to claycraft.
Alright! Once all the based covered with clay, put it aside and wait until the clay dry.
Step 5:
Back to your craft after the base dry and cover the 4 side of wall with clay. Don't forget to make some openings for windows where you can see the light shine out when the tea light candle switched on.
Again, leave it and wait until clay dry.
Step 6:
After the walls dry, attached the roof to the walls with hot glue. And, you can make chimney and attach it to the roof at this stage.
Step 7:
Cover the edges of the roof and soffit with clay and than create stone texture for the chimney.
Finally, cover the whole roof with clay. Here I chose the look of timber shake roof.
Step 8:
Finally, create tree trunks at front and back of the house and pumpkins everywhere you like it.
Step 9:
Paint your pumpkin cottage house and then use strong mod podge or varnish to seal the clay. And, we are done!
Btw, you may want to watch my video below. Have fun!
| Home | ^Top of the Page | Next Project |
Please LIKE, SHARE and SUBSCRIBE to support my channel.
Share your craft
Do you make your craft? Share it!


